Friday, March 29, 2019
Thursday, March 28, 2019
HP Laserjet Pro MFP M29w Installation | 123.hp.com/ljprom29w
How to Setup HP Laserjet Pro MFP M29w Printer?
Quick Steps for First-Time Setup:
- Tear the tape on top of the box to open it.
- Take the printer out of the box and discard all packing materials surrounding it.
- Take the toner cartridge and remove the clips from it.
- Handle both sides of the toner cartridge and gently shake them.
- Drag the orange tab to tear the sealing tape from the toner cartridge.
- Align the toner cartridges along the tracks inside the printer.
- Push the toner cartridge until it fixes into place. Close the ink cartridge access door.
- Drag the output tray, input tray, and their extensions. Mount stack of paper into the input tray.
- Adjust the paper width guides against the edges of the paper.
- Insert one end of the power cable to the printer’s rear and another end to the wall socket.
- Switch on the printer. Install the driver on your system and your printer is now set.

HP Laserjet Pro MFP M29w Wireless Setup
Windows:
- Obtain the network name and password before configuring the printer to a wireless network.
- Turn on the printer, system and the router.
- Connect the system to a wireless network with stable internet access.
- Keep the printer and the system close to the wireless router for better signal strength.
- Connect the Laserjet Pro m29w printer and the system to the same wireless network.
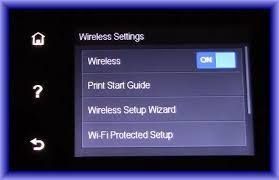
- Use the Wi-Fi Protected Setup process to connect the printer to the wireless network.
- If the router is compatible with the WPS method, long-press the Wireless button on the printer’s control panel for at least three seconds.
- Wait till the Wireless light and Ready light starts to blink. Press the WPS button on your router.
- Wait for at least two minutes for the printer to establish the network connection.
Mac:
- You need a network name and password for connecting the printer to a wireless network.
- Switch on the printer, system, and router.
- Connect the system to a wireless network with an active Internet.
- Connect the system and printer to the same wireless network.
- Move the printer and system to the wireless network for strong signal strength.
- Disconnect the USB cable from the printer’s rear if the system prompts.
- Follow the Wi-Fi Protected Setup method for connecting the printer to the wireless network.
- Check if the printer supports WPS, if so, press and hold the HP Laserjet Pro MFP M29w Wireless Setup button.
- Wait for the wireless light and ready light to flicker.
- Press the PUSH button to establish the network connection.
- Wait for at least two minutes when the printer establishes the network connection.
Saturday, March 23, 2019
HP Ink Tank 319 Installation Guidance | 123.hp.com/inktank319
HP Ink Tank Wireless 319 Setup
Quick Steps for Unboxing & Setting Up:
The initial step after the printer is purchased is setting up the printer. The HP Ink Tank Wireless 319 Setup process involves unboxing the HP Ink Tank 319 Printer, loading the paper into the trays, ink cartridge installation, installing the driver, etc. Break the seal and open the box. A CD which contains steps to install the software, it also contains a user guide and a legal guide. A USB Cable for connecting your printer to the computer device. Take the printer out of the box. Remove all the visible tapes present around the printer and set them aside for recycling. Plug the rear end of the power cord to the printer and the other end to the wall socket. Switch ON the power button to turn ON the printer.

The setup process gets initialized. “Enter” the country name, language, time and date. Touch each option and customize the settings and click OK. The next step is installing the ink cartridges. Fill the ink tanks with the four ink bottles of different colors. Remove the seal on the ink bottle. Place the ink bottles upside down over the spout. The black cartridge slot is black, the other colors are magenta, yellow and cyan. Touch only the plastic region on the ink cartridge. Open the tri-color slot and insert the cartridge. ‘Genuine cartridges installed’ message appears. Pull out the orange plugs and install the paper heads. Pull the tray and load the paper onto the tray
HP Ink Tank 319 Driver Download
- The driver device provides a software interface for the hardware devices and enables the operating system and other programs for accessing the hardware functions.
- A driver is necessary for translating data between a software and a hardware device and the applications or operating system within it.
- There are two methods for HP Ink Tank 319 Setup driver installation. One method is using the CD provided during shipment and the other is from the website.
- Ensure that your PC or laptop has a CD drive and place the installation CD into the drive. Wait until a set of files gets displayed.
- The Autoplay feature can be enabled to display the set of files automatically. The HP Ink Tank Wireless 319 Setup file extension is .exe for windows and .dmg for MAC devices.
- Click the file and the HP Ink Tank 319 Driver Download Starts. Do not turn OFF the system while the downloading is in process. Wait until the installation completes.
- Double click on the file to add the printer to the list. If the printer’s name is not displayed type the name of your printer and add it to the queue.
- If the CD is misplaced or for the latest updates on the driver it can be installed from the website. Choose the mode of connection based on the printer.
- Click the link on the website. After the HP Ink Tank, 319 Printer Driver Download completes, locate your file in the downloads folder. Choose the setup and install it based on the on-screen instructions.
- Examine whether the printer’s name is available in the list. If not type the name of your printer. Try print any test report.
Friday, March 22, 2019
HP Deskjet 2540 Installation Guidance | 123.hp.com/dj2540
HP Deskjet 2540 Unboxing & First-Time Install
Quick Steps for the First-Time Installation
- For 123.hp.com/dj2540 Printer, go through the instructions provided in this section and set up your printer without depending on anyone.
- You have to check the contents that are shipped along with the printer. The components vary for different location and region.
- Free all the components from its packing materials and use the prompts to assemble all hardware.
- Make use of the instructions to establish the printer connection and install the ink cartridge into its slot.
- Make sure that you have placed the plain white unused paper in the loading tray of the printer.
- After you have installed all the ink cartridges allow your printer to align the cartridge to get the most out of your 123.hp.com/dj2540 printer.
- HP Deskjet 2540 Printer Setup and Installation
- You can choose either the USB, Wired, or Wireless connection based on your printer’s compatibility.
- Proceed to search and install the latest software and driver for your printer once hardware assembling gets over.

HP DJ2540 Wireless Setup
- It is well known that the Wireless network mode of connection has three platforms- HP Wireless Direct, WPS, and HP Auto Wireless connect.
- Take a look at the instructions provided in this manual to know the clear details about various platforms of the Wireless network connection.
- HP Wireless Direct is one among of the platforms of the wireless connection which enables you to get connected to the network connection without using an accessing point.
- It connects the Wi-Fi capable devices such as computer, tablets, or smartphones to the wireless network connection directly even with the wireless router.
- Connecting the HP Deskjet 2540 printer to the wireless network is the same method you connect your Wi-Fi capable device to a new hotspot or wireless network
- The tablet, computer, and the smartphones which are connected to the HP Wireless direct and the HP printer already connected to a typical wireless network look the same.
- If you connect the smartphone to the wireless network you should install the corresponding app to proceed to print.
- If you link the computer to the wireless network it is necessary to install the required software on your computer.
- If you want to establish the 123.hp.com/dj2540 printer connection by means of Wireless Protected Setup method use the instructions provided below.
- You have two methods to connect using the WPS mode. One is the Pushbutton mode and another is the PIN method.
- The push button is nothing but enabling the physical pushbutton present on the printer and the wireless router.
- You can choose the Pushbutton method only when your printer and the wireless network router support it.
- Check the documentation to get to know whether your printer and the router have the physical pushbutton icon.
- Your network will use WPA or WPA 2 security. Most of the wireless router fails to connect provided you have not entered any security.
- You cannot connect most of the wireless router using the WPS method if you use the manufacturer’s default network name and password.
- Enable the WPS pushbutton on your 123.hp.com/dj2540 printer. Within 2 minutes you have to enable the pushbutton present on your router.
- You can also make use of the Wireless Setup Wizard to establish the wireless network connection.
- It is possible to run the Wireless Setup Wizard from the printer’s control panel.
- Affirm that you have knowledge about your network name and the security password. The password can be either WEP, WPA, or WPA 2.
- Get directed to the printer’s control panel and click on the network menu or enable the wireless icon and then navigate to the settings.
- Choose Wireless Setup Wizard. You will receive the wireless setup wizard screen with a list of available networks in the area.
- Choose the network name from the list. If your network name is not listed on the screen, you have to enter the network name and the password manually in the column provided at the bottom of the list.
- Make sure that the network name and the password you entered is exactly as the one which you have.
Friday, March 15, 2019
123 HP Laserjet Pro M426fdn Printer Installation
HP Laserjet Pro M426fdn Printer Installation
How to Print from HP LJPRO m426fdn?
- For Windows, choose the Print option from the application you wish to print from.
- Choose the 123.hp.com/laserjet pro m426fdn printer from the list of printers. To modify settings, select the Properties or Preferences button to access the print driver.
- Select the tabs in the print driver to set the available options. Select the OK button to return to the Print dialog box.
- Choose the number of copies to print from this screen.
- Select the OK button to print the document/file.
- For Mac, select the File menu, and then choose the Print option.
- Choose the HP Laserjet Pro MFP M426fdn Multifunction Laser Printer printer. Select Show details or Copies & Pages, and then choose other menus to modify the print settings.
- Choose the Print button.

How to Scan from HP LJPRO m426fdn?
- Place the document face-down on the scanner glass or insert it face-up in the document feeder.
- Modify the paper guides to fit the dimensions of the document.
- For Windows, open HP Scan, choose a scanning shortcut and then modify the settings if required. Choose Scan.
- For OS X, Open HP Scan, located in the 123.hp.com/laserjet pro m426fdn Hewlett-Packard folder inside the Application folder.
- Follow the on-screen instructions to scan the document, After scanning all the pages, select File.
- Then Save to save them to a file.
- Read More...
Wednesday, March 13, 2019
How to Scan on HP Officejet Pro 8710 Printer?
About Scan Function
With the wireless printing, complete your print job easily by printing a document on the go. All you need to do is, connect the printer and computer/mobile to the same wireless network connection. Make use of how to Perform Officejet Pro 8710 Installation instructions that are displayed on the screen to connect the printer and computer wirelessly.

How to Scan on Windows?
Step 1: Prep for the installation process
- Before starting the process, gather the required wireless network name and the password.
- Check whether that the Setup 8710 Officejet Pro Printer and the computer are connected to the same wireless network connection.
- Switch on the printer, computer, and router. During the setup process, place the printer and computer closer and within the range of the router.
- Unplug any USB or Ethernet cables from the printer
Step 2: Link the printer to the wireless network
- From the printer’s control panel home screen, access the Dashboard and then click on the Wireless icon.
- Select the Setup icon, click Wireless Settings and then choose Wireless Setup Wizard.
- Choose your network name from the list of available networks, and then choose Ok.
- In case the list doesn’t contain your network name, select Enter New Network Name and then use the on-screen guides to index your network name.
- If urged, index the WEP or WPA key and then click Done. Select Ok to return to the home screen.
Step 3: Download and install the printer driver
- Look for Driver Download option from this website and click on it.
- Once completing the download process, you have to install the downloaded .exe setup file on the computer.
- During the installation process, choose Wireless as the connection type and complete the installation by following the how-to Perform Officejet Pro 8710 Installation guidelines.
How to Scan on Mac?
Step 1: Make an arrangement for the installation
- Gather the network name and password to connect the printer and computer over a wireless network connection.
- Power up the computer, router and the Setup 8710 Officejet Pro Printer. Check whether that the computer and printer are connected to the same wireless network connection.
- During the setup process, position all the network connected devices at a closer distance to maintain the wireless signal strength.
Step 2: Connect the printer to the wireless network
- From the control panel of the printer, open the Dashboard and then select the Wireless icon.
- Select the Setup icon and click on the Wireless Settings option.
- Choose Wireless Setup Wizard, select the network name from the list and click Ok.
Step 3: Download and install the printer software
- Find the Driver Download option from this website and select it. Install it on the computer by following the on-screen how to Perform Officejet Pro 8710 Installation guides.
Tuesday, March 12, 2019
HP Officejet 5255 Printer Functions | 123.hp.com
How to Print on HP Officejet 5255?
Step 1: Place enough amount of blank paper in your printer, in order to overcome the page ordering issues. Click on File on the document, and then tap on Print.Step 2: Choose your printer name. Click on "Printer properties", Preferences, or HP Officejet 5255 Printer Setup. The Document Properties or Printing Preferences window displays.
Step 3: Check if you can find the printing shortcuts tab. Tap on Print on Both sides or Two-sided Printing option if it is available.
Step 4: Tap on the Layout, Features, or Finishing tab if it is not available. Choose Print on Both Sides or Two-sided printing. Choose the binding or page flip button. Tap OK, then select Print.
Step 5: Remove the printed page. Then load it in the input tray and select Continue. The page’s other side gets to print.
How to Copy on HP Officejet 5255?
Follow the instructions that are given below in simple stepwise format if you want to copy the documents and the photos.Step 1: On the scanner glass or in the automatic document feeder, place the document or photo. It might vary based on your printer type.
Step 2: The photos should be loaded on ADF. Click on the Copy, Copy Document, or Copy Photo on the control panel screen. Then make the changes in the available basic settings as required.
Step 3: Tap on the 123.hp.com/oj5255 Setup Settings option or the Gear icon if you want to access more advanced copy settings. Make the required changes.
Step 4: Then choose the Start button. Tap on the Back option to return to the main copy screen. To the main copy screen, you will be reverted.
Step 5: Then choose the Start Black, Start Color, or Ok button. At once, the copy job begins. You can remove the document from your device, once the copy job is completed.
How to Scan on HP Officejet 5255?
Make use of the instructions that are given below to scan the documents from your Windows computer.Step 1: First take the document and place it on the scanner glass on your printer. Depending on the type of your printer, load it either in the document feeder slot or in the automatic document feeder.
Step 2: Inserting the photos on ADF causes the problems on your device. So avoid it. Search for HP in the Windows. Tap on your HP Officejet 5255 Printer Setup model name in the displayed results.
Step 3: When the HP Printer Assistant gets open, tap on Scan a Document or Photo and the HP Scan gets open.
Step 4: Then, choose a shortcut key that is similar to the file type and it should also open the resulting action that you require. Alter the available settings in the right pane if you want to change any settings.
Step 5: Click on the Scan button on your computer screen after you have made all the changes. The scanning process begins. After the scanning process completes, the document gets scanned Read More...
Monday, March 11, 2019
HP Envy 4500 Wireless Setup | 123.hp.com/envy4500
The HP Envy 4500 printer supports wireless connectivity. You don’t need a wire or cable to connect your printer to your computer. Follow the steps given below to HP Envy 4500 setup wirelessly.

Step 1: Preparing For Wireless Setup
- Before setting up your 123.hp.com/setup 4500 printer wirelessly, you need to gather a few important details such as the name and password of your wireless network.
- "Connect the power cord" to the router and switch it on. Wait for the network to stabilize. Turn on your computer and connect it to the same wireless network to which you will connect your printer.
- Turn on your printer and wait for it to complete the preparation process. Disconnect all the USB and Ethernet cables from the printer connecting the computer.
Step 2: Connecting Printer to the Wireless Network

- "Tap" on the small Wireless icon on the printer’s control panel to open the Wireless Setup menu. Navigate to the Wireless Setup Wizard option and tap on it.
- The Wireless Setup Wizard will initiate. Follow the prompted commands to run the setup and select your wireless network from the list of available networks.
- If you don’t find the name of your network, tap on the Enter New Network Name option. Key in the details of your network and connect your printer to the network.
- Make sure that you connect your 123.hp.com/setup envy4500 printer and computer to the same network. Do not connect them to a guest network such as a school’s network.
Step 3: Installing the Driver for Windows
- You can either use the installer CD or download the printer driver from our website. It is recommended to choose the latter option.
- Open the downloaded 123.hp.com/setup 4500 driver and install it on your computer. Select Wireless as the connection method and connect your devices.
Step 4: Installing the Driver for Mac
- Download and follow the prompted HP Envy 4500 setup instructions to install the printer driver on your computer. When prompted, select Wireless as the connection type.
- To add your printer to the Printer Queue, select the name of your printer under the Use menu. Tap on the Add button to add the HP Envy 4500 e all in one printer setup.
Saturday, March 9, 2019
HP Officejet Pro 6978 Wireless Setup | 123.hp.com/ojpro6978
Quick Steps for Wireless Setup
- Ensure the wireless icon is Switched on.
- Check whether your printer is connected with a wireless network.
- "Open" WiFi settings, and check your printer is connected with the same wireless connection.
- Go to App store and choose compatible printing app.
- Next, click on App share button and search Print icon.
- Move to Home Screen, Open the document, then click Share Icon.
- OR Click the Main menu, and Click Print Button.
- Select File to Print, and click Print option.
- In Printer Options, Select your 123.hp.com/setup 6978 printer.
- Go to Print Settings, Enter copies number, and click Print.
- Print Job did successfully.

Detailed Guidance for HP OJPRO 6978 Wireless Setup
Step 1: Arranging for Printer Installation
- The network name and network password must be collected.
- A computer must be connected to your wireless network.
- Internet access: Such as cable or DSL for software downloads must be gathered
- Ensure the router and computer are switched on, and that the computer and 123.hp.com/ojp6978 printer are connected to the same HP Officejet Pro 6978 wireless network. Switch on the printer and place it near to the computer within the range of the router through the 123 HP setup 6978 processes.
- Detach any USB or Ethernet cable from the printer and for more use HP Officejet Pro 6978 manual.
- From the home screen of the HP Officejet Pro 6978 Printer Setup control panel, scroll down to open the Dashboard, and then click on the Wireless icon.
- Click the Setup icon.
- Tap on Wireless Settings, and then click on 123.hp.com/setup 6978 Wireless Setup Wizard.
- Enter the name of your network in the list of existing networks, and then click OK.
- If the list does not cover your network name, tap on entering New Network Name, and follow the on-screen instructions to tap your network name.
- If interrupted, type network password and then touch Done.
- A summary screen exhibits. Touch OK to return to the home screen.
- Tap on download, and then click Open, Save, or Run in any windows that display to install the driver to your computer.
- To launch the HP Officejet Pro 6978 Driver Installation double-click the driver file in the browser downloads bar or in the Downloads folder on the computer.
- To download the installation and complete the connection setup follow the 123.hp.com/setup 6978 on-screen instruction.
After completing all the above steps, power off your computer and power it on again.
Friday, March 8, 2019
How to install HP Officejet 6950 Printer? - 123.hp.cm/oj6950
Quick Steps for HP Officejet 6950 First-Time installation:

- Take out the HP Officejet 6950 Printer from the box. Eradicate all the packing materials from the interior or exterior of the printer.
- Discard the sticker on the printer’s control panel. Elevate the scanner lid. Take out the packing materials in the lid.
- Seal the scanner lid. Elevate the output tray. Drag the input tray towards you to access it.
- Drag the input tray forwards until it fixes into place. Shut the output tray. Once you have done with the step, move to the next step.
- Plug in the power cable to the rear of the HP Officejet 6950 Setup and the other end to the electrical outlet.
- Once you have connected the power cable, switch on the printer. On the printer’s control panel, tap the preferred language.
- After customizing the preferences, tap OK to confirm the choice. In case prompted, choose date and time.
- Elevate the ink cartridge access door until it snaps into place. Halt until the carriage is inactive prior to proceeding.
- Discard the packing materials from the carriage. Take out the cartridge from the packaging. Drag the orange tab out.
- Grasp the ink cartridge by either side and then rotate the protective orange cap counterclockwise to fix it off.
- While inserting the cartridge, make sure that the ink cartridge contacts facing downwards and move the cartridge inwards.
- While placing the ink cartridge, examine whether the label color matches the color dot on the carriage.
- Move the ink cartridges into their respective slots and carefully press the top of the cartridge until it fixes into place.
- Once you are done with the installation process, seal the ink cartridge access door for secure installation.
- Elevate the output tray and then drag the input tray towards you to access it. Move the paper width guides to their farthest position.
- Insert plain paper into the input tray. Shove the stack into the tray until it fixes into place.
- Move the paper width guide until it fixes against the edges of the paper. Shove the input tray forward until it fixes into place.
- Close the output tray. You need to install the install driver and software for the printer to print from the 123.hp.com/oj6950 printer.
Thursday, March 7, 2019
HP Envy 4500 Unboxing & First-Time Installation
First-Time Printer Setup Guidance
Step 1: Unpacking HP 4500 Printer from the Box
- The first thing to do after getting the HP Envy 4500 printer setup is to unpack the printer box. Tear off the packing tapes on the printer box and open it.
- Remove the contents of the printer box. The contents of the box include a printer body, ink cartridges, user manual, power cord, installer CD, printer parts, etc.
- Remove all the packing materials and packing tapes on the printer. Check the sides and rear of the printer for packing tapes and remove if you find any.
- Open the printer’s access door and remove the packing tapes from the printer’s interior. Peel off all the tapes on the scanner glass and the paper tray of the 123.hp.com/envy4500 printer.

Step 2: Setting The Preferences
- Connect one end of the power cord directly to the wall outlet and the other end to the printer’s rear. Do not connect it to a power surge or an electrical surge.
- Switch on the HP Envy 4500 setup printer and wait for it to settle down. Set the desired preference such as language, region, date and time, etc.
Step 3: Loading Paper in HP Envy 4500
- Pull the paper tray out and move the paper width guides. Load a stack of paper and close the paper width guides in such a way that it brushes the edges of the paper.
- Open the ink cartridge access door and wait for the carriage to move to the center. Take the new ink cartridge out from the package.
- Remove all the packing tapes on it. Hold the ink cartridge by its sides and install it into the correct slot. Push until it fits. Close the access door.
Step 5: Aligning The Ink Cartridges
- Open the scanner lid and place a plain white paper and use HP Envy 4500 scan software. Position it according to the engraved guides. Tap on the Ok button to align the ink cartridges.
- To connect your printer to your computer, you need to install the printer driver on your computer. You can download it from our website or use the installer CD, Read More...
Wednesday, March 6, 2019
HP Officejet Pro 8710 Scan Function Guidance | 123.hp.com/ojpro8710
About Scan Function
HP Officejet Pro 8710 scanner software has always been a crucial part of today’s fast-paced world. Whether you run a business or organize a home business, you will always need to keep a soft copy of your documents. 123.hp.com/ojpro8710 printer with a scanner can help satisfy your basic needs. It is a perfect choice for those who want to maintain a number of documents on your system.
How to Scan Document using Scanner Software?
- Place the item you want to scan on the scanner glass or in the document feeder slot, or in the automatic document feeder (ADF) that depends on your requirement. In the case of photos, make use of the scanner glass to avoid damages.
- Search Windows for your HP Officejet Pro 8710 setup name.
- If the system displays your printer name, click the printer name in the list of options.
- If your printer is not displayed, download the print driver from our website.
- Open the HP 8710 software, click Scan a Document or Photo. The HP Scan opens in a new window.
- Choose any of the shortcuts that match the file type and the resulting action you need.
- Modify any of the shortcut default settings on the right side of the HP Scan window, if required.
- Click Show scan preview or Show Viewer After Scan to preview and make further edits to the scanned document before saving it on your computer.
- To make alterations to the settings such as quality, color, and default scan destination folder, click Advanced Settings or More.
- Click Scan. The 123.hp.com/ojpro8710 printer scans the file, and then a preview of the scan is displayed in the HP Scan.
- If required, double-click the thumbnail image of the scanned file for further settings.
- Click Save and the Save as windows open.
- Choose the folder that you want to save the scan, change the File name if required, make sure of the file type in the Save as type menu, and then click Save.
- Open the folder in which you have saved the scan in, and then double-click on the file to view your scanned file.
Tuesday, March 5, 2019
How to Scan on a HP Officejet 3830 Printer | 123.hp.com/oj3830
How to Scan a Document Using Scanner Software?
Follow our practical HP Officejet 3830 manual guidelines to complete the function successfully.
Step 1: Mount the photo or document into your printer.
- Ensure the HP printer 3830 software is installed and the printer is switched on and connected to the PC through a wireless or USB cable before scanning.
- Switch on the power button of the printer.
- Mount the photo or document onto the scanner glass or ADF.
Step 2: Follow this step to scan the document or photo
- Click scan on the control panel of the printer with HP Officejet 3830 scanning software.
- Click on the name of the computer that you want to save the scan to with hp officejet 3830 manual.
- Click on OK.
Switch on the Enable Scan to Computer function if the printer does not have a scan button.
- Click on finder and go to the top menu bar to click applications and then double click on HP folder and then HP utility.
- Tap All Settings, click Scan to Computer, then select Enable Scan to Computer.
- On the control panel of the hp officejet 3830 setup printer, scroll to the scan menu or icon, then choose your computer name.
- A folder displays on the Mac where the scanned file has been saved.
How to Scan a Document on Windows?
- Download and install from the App Store.
- Mount the document on the scanner glass and close the scanner lid.
- From the drop down menu, choose 123.hp.com/oj3830 easy scan.
- From the presets menu select scan type and click on scan.
- Tap on Edit to alter colors, straighten the scan, or crop the size.
- To save your scans to a folder on the Mac, click Send and then click Folder and to save scan from the windows click on where menu.
How to Scan a Document on Mac?
- Mount the document or photo that you want to scan on the scanner glass, or load it into the automatic document feeder (ADF) if your 123.HP.Com Officejet 3830 printer is compatible with both.
- Click on Scan app in the list of results and if does not display click on windows scan from the app store.
- Tap on Show more to alter settings such as Color mode, Resolution, and where to save the file.
- Tap on Scan from 123.hp.com/oj3830 scanning software.
Monday, March 4, 2019
How to Install HP Deskjet 2652 Driver Software? - 123.hp.com/dj2652
123 HP DJ2652 Driver
A driver is most important for all the devices to operate well. Each operating system has a unique software. There are two methods to install the driver on the computer. Follow the guides that are mentioned below to HP Deskjet 2652 setup driver install.

Download and install the software on your Windows computer
- Make sure the HP Deskjet 2652 printer is powered on.
- Remove the USB cable from the printer, if it is connected with a computer or any other device.
- Go to our website 123.hp.com/setup 2652 and enter the HP Printer name and model in the product field.
- Go along with the prompts on the windows screen to get into the downloads page.
- Click Download under the 123.hp.com/dj2652 printer driver or software. Open the downloaded folder and then install it on your Windows computer.
Run the Setup File from the Website
- Find the Driver Download option from this website 123.hp.com/setup 2652 and select it to get the full feature driver and software for the www 123 hp com dj2652 printer.
- For Windows operating system, you have to download the .exe file type and for Mac OS, download the .dmg file type.
- Once completing the download process, you have to start the installation process.
- Install the downloaded software on the computer where you have saved the documents for Printing, Copying, and HP Deskjet 2652 how to scan.
- During the installation process, you are prompted to choose the connection type, select the preferred connection type, based on the printer compatibility.
- Complete the installation by following the guides that are displayed on the screen.
Run the Setup File from the Disc
- Make use the installation CD that came with the 123.hp.com/dj2652 printer to install the printer driver.
- Power on the computer where you need to install the software. Ensure that the CD is free from dust and scratch.
- Open the computer’s disc drive and place the CD into it. Based on the instructions, run and execute the setup file.
- Agree to the Terms and Conditions, click Continue –> Next –> Done.
- After completing the installation, try printing a sample document using the HP Deskjet 2652 setup printer to check its performance.
Saturday, March 2, 2019
HP Envy 5055 First-Time Installation | 123.hp.com/envy5055
HP Envy 5055 Printer First-Time Installation
SIMPLE STEPS FOR HP ENVY 5055 SETUP AND INSTALLATION- Go to 123.hp.com/envy5055.
- Download Driver Software for HP Envy 5055 Printer.
- Enter your printer model and click Begin for your HP Envy 5055 Driver Download.
- Click Download, then Open, Save or Run on the window that displays, to download the driver
- Double click on the driver file downloaded to your computer to start the installation process.
- Follow the on screen instructions and complete the HP Envy5055 printer connection setup and the driver installation.
- Now come back to HP Envy 5055 Printer Setup Page to finish registration and activation.

Quick Steps for HP Envy 5055 First-Time Installation
- Remove the 123.hp.com/envy5055 Printer from the box and discard all tape, stickers and packing materials from the printer. Discard the sticker from the control panel.
- "Hold" the handles on either side of the 123 HP Envy 5055 Printer and lift the cartridge access door. Remove all tape and packing material from inside the Envy 5055 printer.
- Close the access door and open the input tray door. Pull the tray toward you and remove the packing tape. Push the input tray forward until it places properly to close the input tray door.
- "Connect" the HP Envy 5055 Printer Setup to a wall outlet, switch on the printer and set your preferences. To set the preferences on the printer’s control panel, choose your preferred language and country/region.
- "Click" on the Yes option to confirm your choice and if prompted, select the date and time and click on the Yes option to confirm your choice. Proceed to the next 123.hp.com/envy5055 step to install the ink cartridges.
- Use the ink cartridges that came in the box with your Envy printer. Lift the ink cartridge access door until it locks into place and wait until the carriage halts.
- "Remove" one of the ink cartridges and discard the plastic tape from the ink cartridge. Remember to not touch the copper-colored contacts or the ink nozzles.
- With the nozzles facing the printer, insert the ink cartridge into its slot until it clicks into place. Place the color ink cartridge on the left slot and the black ink cartridge on the right.
- "Close" the lid on the ink cartridge slot and close the ink cartridge access door. Insert plain U.S. letter paper in the input tray, open the input tray door and pull it toward you to extend the input tray.
- "Slide the paper" guides such that it fits the edges of the paper. Mount the paper in portrait orientation and make sure you do not load more than 250 sheets.
- "Do not push" the guides in so tightly that they damage the paper. Push the input tray into the Envy 5055 printer and click Done on the printer’s control panel.
- "Align" the ink cartridges to achieve the best print quality. Raise the scanner lid and place the alignment page with the print side down on the scanner glass. Close the scanner lid and click OK. Install the software for the printer.
Subscribe to:
Posts (Atom)