Saturday, October 3, 2020

Easy & Quick Guide For Epson XP 340 Setup

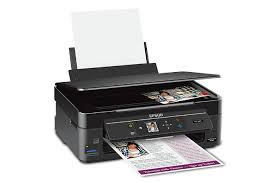
 Epson XP 340 is a wireless color printer that allows you to print wirelessly and it is most suitable for printing photos. It is a fast and simple All-in-One printer. Consider the steps that are given below to Epson XP 340 setup the printer.


Step 1:Unpacking the printer


  First, take out the printer from the carton and place it on a flat surface.

  Remove all the packing materials like tapes, covers, and films from the printer.

  Open the scanner unit. 

  Remove the protective films and tapes inside the printer. Close the scanner unit.

  The printer components that are included in the package consist of the following.

  Power cord

  Installation disc

  Ink cartridges

  Manuals and guides


  Step 2: Configuring the printer


  Connect the power cord to the printer.

  Plug in the other end of the power cord to an AC outlet.

  Press the Power button on the printer to turn it on.

  Lift the control panel of the printer to a convenient angle.

  Choose your language using the navigation buttons on the printer.

  Set the date, time, and other required settings on the printer.

Learn More

Guidance For Norton security deluxe setup

 Norton security deluxe comes with the latest features such as real-time threat protection, secure vpn, parental control, password manager, pc cloud backup, safecam for pc.Here are the features and instructions to download the Norton security deluxe setup.


Step 1:It can offer protection for up to five pcs, mac, smartphones, or tablets.

Step 2:It provides seventy-five gb (giga bytes) storage space for storing your essential files. It can prevent loss of data, hard drive failures, and ransomware.

Step 3:The safecam for pc assists you to block the unauthorized access on your pcs webcam.

Step 4:Secure vpn allows you to browse more securely while using public wi-fi and safecam.

Step 5:The cloud backup and safecam features are only available on windows, and parental control is not supported on mac.

Step 6:Download the norton security deluxe from the official site.

Learn More

Simple Guidelines For Norton antivirus for laptop

 Norton security application is used to protect your system from harmful threats. Norton’s internet security application has six patented layers of protection that secures your laptop from almost any kind of threat. To secure your personal information while using a public wi-fi network, you can use the norton secure vpn application. Install the norton secure vpn application on your system to protect your data. In most of the norton applications, you can find the antivirus, virus removal, malware protection, cloud backup, password manager, and secure vpn features. Download and install Norton antivirus for laptop, as per your requirement. In the section below, you can find the information related to the norton internet security software features, and steps to install, remove, and disable it. Read the instructions given below and proceed with the same.


Norton internet security is an application that protects your personal information. Some cool features that you can access by installing the norton internet security application on your system are listed below.


Six patented layers of protection.

Auto-update automatically updates your norton product.

Threat-removal layer helps to remove all kinds of threats.

Scam insight if you are visiting unknown or unauthorized websites, this feature alerts you. Reviews the website and tells you if it is safe to share your personal information.

Learn More

Do You Want To Set up POP3 On Windows Live Mail?

The Windows Live Mail email client supports pretty almost all the email serves. You can set up your email accounts either automatically or manually. In case your email service provider is not recognized by Live Mail, then you have to set up your email account manually, either using the incoming and outgoing server settings. SMTP is the outgoing mail server and for the incoming mail server, your choose either IMAP or POP. So, before you proceed to set up your email account in Windows Live Mail, gather the required details.


Here we shall see the steps on how to set up POP3 on Windows Live Mail.


Step : 1

Open Windows Live Mail on your computer and click the File menu.

Step : 2

Move down to Options and click it followed by Email accounts.

Step : 3

In the Account dialog window, click the Add button.

Step : 4

Now, you will see the Add an account dialog window. Here click the Email Account option and click Next.

Step : 5

In the next window, you have to enter your email account information.

Step : 6

Email address: Make sure to enter your full email address with the domain name.

Learn More

Do You Want To Stop Receiving Phishing Emails?

 If you are receiving too many spam emails, you can easily stop them. Phishing emails will be similar to the emails you already use. But, it will prompt you to enter your credit card number, PIN, and personal details. When you enter these details, your account will be hacked easily. Consider the ways that are given below how to stop receiving phishing emails. 


First Step: Blocking phishing email addresses


Step : 1

First, open your browser and launch the official website of your email domain.


Step : 2

Log in using the valid credentials.

Step : 3

If you are using an email client, make sure to log in to your email account.

Step : 4

If you are using a Gmail account, open the phishing email.

Step : 5

Click on the More icon near to the Reply icon.

Step : 6

Now, select the Report phishing option from the displayed list.

Learn More

Thursday, October 1, 2020

Quick Guidelines For Brother HL L3230CDW Setup

 Brother HL L3230CDW is a color wireless printer that is suitable for business purposes. It provides easy connection features that include both the USB and Ethernet connections. It has a 250 sheet capacity tray so that you don’t have to refill paper frequently. The printer helps to print in color at an affordable price with good print quality.


Step 1: Unpacking the printer


  First, take out the printer from the packing box and keep it on a flat surface.

  Remove all the packing materials like tapes and plastic films from the printer.

  The components included in the printer package consist of the following.

  Drum unit and Toner cartridge assemblies (pre-installed)

  Waste Toner Box

  AC Power cord

  Quick Setup Guide

  Product Safety Guide

  Bell Unit 

  Installation disc 


  Step 2: Installing the toner cartridge


  Open the top cover and slide the yellow drum locks outwards.

  Take out the pre-installed toner cartridges and waste toner box.

  Gently shake the toner cartridge and remove the orange packing restraint.

  Insert it by following the color codes. Fix all toner cartridges one by one.

  Adjust the locks and close the top cover.

Learn More

Simple Guidance For Sophos UTM Home Edition Installation

With Sophos Unified Threat Management, you can create policies for threats and view reports which shed light on risks. The Sophos Utm home edition installation is quite simple and can be done via the ISO image on a CD or a USB stick. You can control several modules such as web protection, email protection, network protection, etc., from a single application.


To set up Sophos UTM Home Edition, follow these guidelines below. After Sophos Utm home edition installation, it prompts you to enter an IP address in the web browser's address bar.


Step 1:Type it and press Enter. The Sophos dashboard appears.

Step 2:On the Basic system setup page, key in theHostname, company/organization name, City, passphrase, confirm passphrase, and admin account email address. Select your country from the drop-down list. Check all the details entered on this page and then click the I accept the license agreement checkbox. Click Perform basic system setup.

Step 3:When prompted to enter theSophos UTM username and password, make sure that you enter them correctly and then clickLogin.

Step 4:The Sophos setup wizard page loads. Click the Continue Radio button. Click Next for Sophos UTM home edition setup.

Learn More